Are you ready to make your model? Your library is up-to-date? You have a basic knowledge of how to work with LDCad? Then you are ready to go! Or not?
Two tips that can help you save time when making building steps:
- Add three hotkeys
- Add a rotation step setting
After that you can REALLY start making the building steps
To make your life a little bit easier (and save a lot of time) when making building steps… make new hotkeys! These two hotkeys will help you with dividing the parts in your model into logical steps.
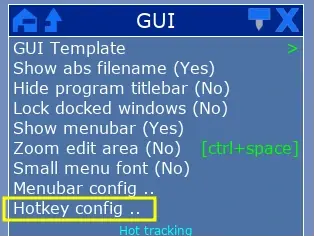
In your LDCad-menu you click on "Prefs" and in the pop-up you click on "GUI".

A new pop-up window opens called "GUI". Click on the option "Hotkey config..".
A new pop-up window opens called "Hotkey management".
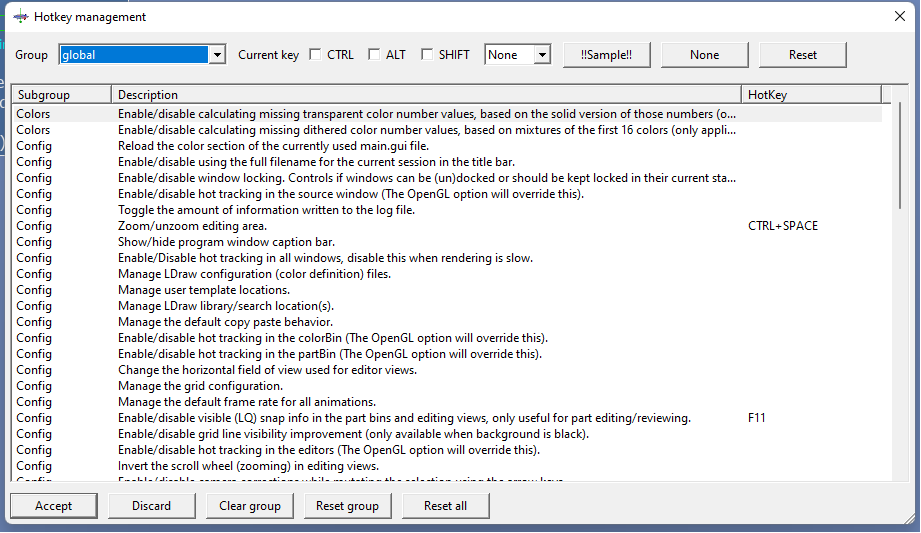

Scroll through the list and find the subgroup "Select" (look in the first column). Find the command "Invert the current selection". Select this line by clicking on it. The line will become blue.


Open the pop-up window "Hotkey management" again (see previous steps).
In the top part of this window you change the group to "macros". The list in the window changes.

Scroll through the list and find the subgroup "steps.lua/runMo..." with the command "This will move the selection to a new step after the current one". Select this line by clicking on it. The line will become blue.

Open the pop-up window "Hotkey management" again (see previous steps).
In the top part of this window you change the group to "edit session". The list in the window changes.
Scroll through the list and find the subgroup "Step navigation" (look in the first column). Find the command "Edit the current step's properties". Select this line by clicking on it. The line will become blue.

You have just made three new hotkeys:
- F1 - invert the current selection
- F2 - move the current selection to the next step (and make a new step if there is none)
- F4 - edit the rotation angle of a step
To also save some extra time, you can add a rotation step setting. You can rotate parts a lot quicker... or more refined!
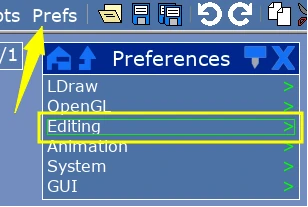
In your LDCad-menu you click on "Prefs" and in the pop-up you click on "Editing".
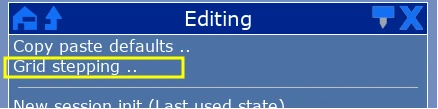
A new pop-up window opens called "Editing". Click on the option "Grid stepping..".
Step 3.
A new pop-up window opens called "Grid stepping". In the bottom section (called "Rotation stepping") click on the button "New".
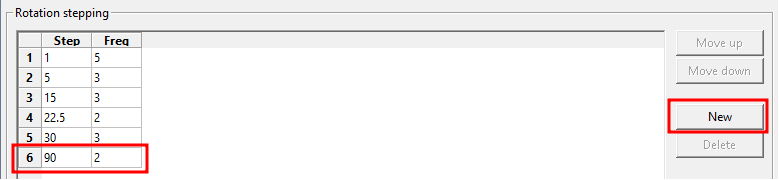
A new row (rownumber 6) is added to the setting. Fill the step column with "90" and the freq column with "2".
Step 4.
To add another really fine rotation option, click on the button "New" again in the Rotation stepping section.
A new row (rownumber 7) is added to the setting. Fill the step column with "0.5" and the freq column with "1".

Step 5.
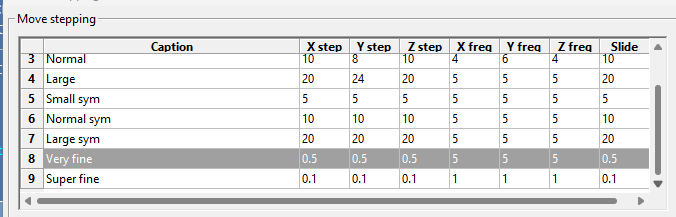
To add a really fine move option, click on the "New" button in the upper "Move stepping" section.
A new row (rownumber 7) is added to the setting. Fill in all columns as shown on the right: Very fine, 0.5 (XYZ step), 5 (XYZ freq) and 0.5 (slide).
Step 6.
To add a super fine move option, click on the "New" button again in the upper "Move stepping" section.
A new row (rownumber 8) is added to the setting. Fill in all columns as shown on the right: Super fine, 0.1 (XYZ step), 1 (XYZ freq) and 0.1 (slide).
Click on the "Accept" button to activate all new settings.

To activate the new rotation settings with the keyboard:
- Select a part
- Press the "R" key for Rotation
- Press "Control" + "6" for 90 degree rotation
- Press "Control" + "7" for very fine rotation
Other rotation modes are Control + 1-5.
To activate the new move setting with the keyboard:
- Select a part
- Press the "M" key for Movement
- Press the "8" key for the very fine movement
- Press the "9" key for the super fine movement
Other move modes are 1-7.
In my opinion there are three ways to do find out what you want as a building step:
- Have the actual model on your desk. Break it down step by step. Every step needs to be build digitally! This is the best way to make instructions. You can see what works and what’s logical.
- Make a complete digital model. Add the steps when you are finished. You are making it hard on yourself, since you have to think back what the best order of steps was while breaking it down. Or if you don’t have a real model, just a digital model, you have to guess the best way to break is down with real bricks. This approach can lead to many corrections when you build it for real when the instructions are finished.
- Make a digital model with steps from photo instructions. Each photo becomes a step. This can lead to many small steps, because you of the limitations of what you can show in one photo. Best way is to build the model from the photo instructions first. Then break it down again and make digital building steps while doing it.
If possible – always have the real model at your disposal. It takes a lot of practice to make good instructions without a model.
Now you can start your step editing. What commands do you need and where can you find them?
Five really important buttons can be found in the menu.You can do a mouse-over to know what each one does.

In order:
- Go to the first building step [ctrl+pgup]
- Go to the previous building step [pgup]
- Go to the next building step [pgdn]
- Go to the last building step [ctrl+pgdn]
- Append a new building step after the last one [ctrl+ins]
Or you use these hotkeys:
- F1 - invert the current selection
- F2 - move the current selection to the next step (and make a new step if there is none)
- F3 - add a new building step after the last one
In the main edit window you see another VERY important piece of information: the step-indicator.
It's the current step and the total number of steps.

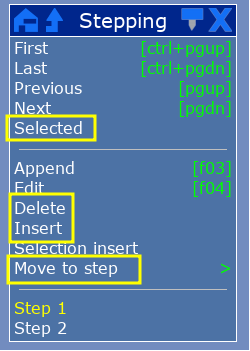
Click on the step-indicator to open the step menu. Some commands I want you to know:
- Selected – go to the step where the current selected parts are first used
- Delete - delete the current step
- Insert - insert a new step in front of the current step
- Move to step – move the selected part(s) to another step – click on it and select the step
An important part of making the instructions is thinking about how to present the model to the user. The building step must be seen clearly. And since your making a digital model, you can rotate the model in infinite ways. You have to decide how you present the model to the “camera” with each step. It's fastest to setup the camera in LDCad.
There are two important hotkeys for setting up the camera with each step:
- [B] – enable / disable step rotation usage – usually I double tap [b] to see what the camera position is in the instructions
- [CTRL] + [B] – open the “step properties” window (note: this does not work in the last step of the model)
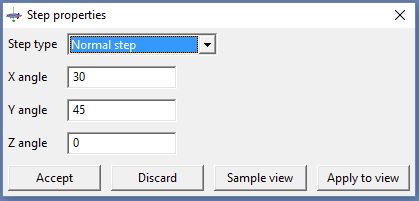
Press [ctrl]+[b] to open the "Step properties" window
There you can choose from are a number of step types. I only use two!
- The “Absolute rotation step” – this locks the camera in the desired position for the instructions
- The “Normal step” – this uses the same camera position as the previous step.
There are three variables that determine the camera position: X-angle, Y-angle and Z-angle.
You can also rotate the model in LDCad in a desired position and "copy" the rotation settings to your step:
- Rotate your model to the desired position
- Press [ctrl] + [b] to open the "Step properties" window
- Set the step type to "Absolute rotation step"
- Press the button “Sample view” to determine the current rotation
- Press the button “Apply to view” to lock the current step in this rotation
- Press the Accept button
I usually work with eight basic camera positions. For this to work you have you start building your model in de basic position: front-right view. And the front side of your model and the right side of your model should be facing the camera just like in the example picture below.
It’s best to setup your file in the correct basic position before you start building:
- Start a new file.
- Add an empty step – [ctrl+ins]
- Go to the first building step – [pgup]
- Open the step properties window – [ctrl+b]
- Set the step to “absolute rotation step” – front right view (30 – 45 – 0) and click “Accept”
- Double tap [b]
To prevent from doing this every time, you can also save this new file as “basic_empty_ file” and use it every time you start a new model.
8 basic camera positions


To be able to create callouts in LPub3D, you have to make subfiles in LDCAD:
- Select the bricks you want to put in a callout
- Right-click this selection
- Choose “Reorganize” > “Move to subfile”
- Keep clicking “Accept” untill you’re back in the main model (that’s the easiast if you’re starting out)
- To make steps in the callout-model:
- Double-click the callout-model to open it
- Organize the steps (you can edit the callout-model just as it’s a normal model)
- To go back to the main model: click <control> + <end>